The goal of the course is to master 3D tools in order to create stunning product renderings. We focus on visualising convincing looking materials and the gritty details of light and render techniques.
At the start you will select a design of your own or an existing product such as a design classic to create a surface model of it. Then, you will use this model to explore various materials and to render a couple of visualisations.
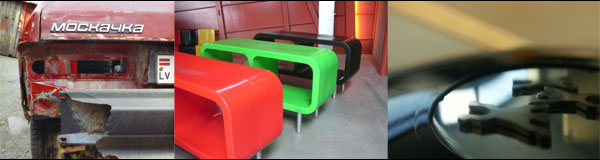
The final visualisations will consist of a mix of your 3D model and existing images like advertisements or photos. The materials should fit both the product and the mood set by the images.
This schedule page is updated for semester 1 2010/2011.
Maya at home
You can get the latest Maya software from blackboard.
computer rooms
The main part of this course consists of a practical in the computer room. We will use the computer room Zebra 1 on Wednesday and ID-Panorama_1 on Thursday morning.
course contents
The course consists of three parts: In the first part ( about 3 weeks ) you will choose a product and model the product with Maya Nurbs. In the second part ( 2 weeks ) you will do a material study with your product. In the last part ( 2 weeks ) you will render product presentations.
The course starts with the introduction lecture Wednesday September 10 in room ID-Emile-Truien at 8:45. The sheets will be available. find last years sheets here ( 14 mb quicktime ipod compatible ). You have to come to the first lecture if you want to attend the course. We have only a limited amount of computers and are overbooked, so first come first serve. During this course you work in pairs; try to find someone the first week.
modeling
Start learning maya using the helpfile ( chapter getting started : maya basics ) and the roller and webcam tutorials on the learning page
In the first week you should choose a product to use. You should have a physical model of the product so that you can have it with you when working with Maya. Your model should not be to complex. To get an impression of the kind of complexity manageable in the course, have a look at the galleries with work of previous runs of the course. You can also browse the virtual design museum to get inspired.
In the second week we've planned a product discussion, which takes about 10 minutes each group. On both these days you can have your product photographed by the staff; the photos will be available online. In this discussion we review the feasibility of modeling the product in Maya and discuss the initial modeling strategy. For this discussion you'll have to bring:
- The physical model ( if you have it ), sketches and drawings. Bring a few different models if you are not sure.
- a plan for the modelling phase. ( What volumes does the shape consist of, how are the parts integrated. )
You need to have the model approved by the staff.
materials
After detailing and finishing the model, you will create a small number of materials based on inspirational images. Try to create a range within one material for instance varying texture of transparency.
The material part will start with the iMac tutorial which shows how to create digital materials. Later on you can do the compositing tutorial for mixing images and 3D models.
Halfway the course we've planned a second discussion to discuss your material and presentation plan. For the discussion bring the following materials:
- moodboards, advertisements, inspirational images you plan to use.
- a plan for the material study.
- a plan for the presentational renderings.
presentation
In the end you will render your product in a context set by the inspirational images. The material will complete the fit. Create about three renderings.
deliverables
The final delivery date is November 1. Your portfolio should consist of the printed renderings together with all the files needed to redo the renders.
In the portfolio we need the following items:
- Color printed images of the presentations
- The images as digital files
- The files needed to rerender the presentation. Put them in a project directory
The portfolio will be judged on the three phases: model, material and presentation. We look at both the technique and the result.
After you've prepared the digital materials you can deliver them on a stick or cdrom.